
-
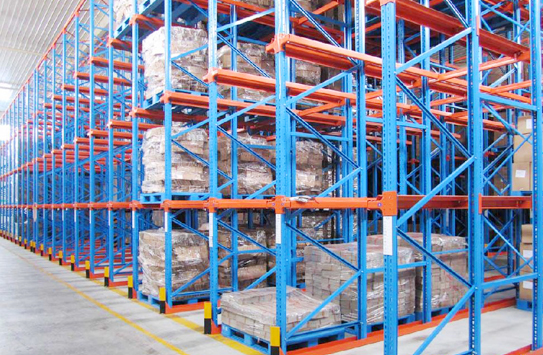
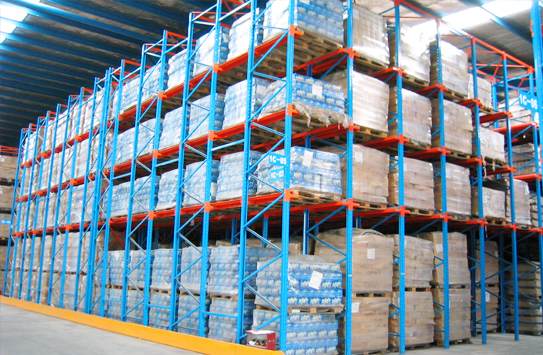
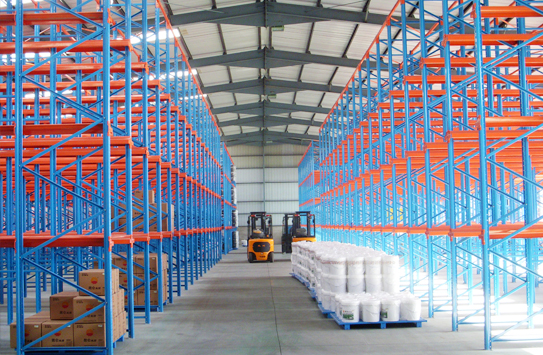
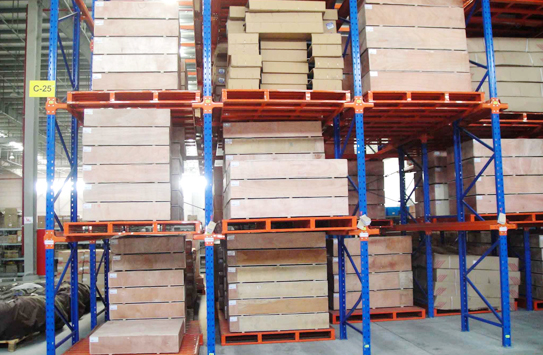
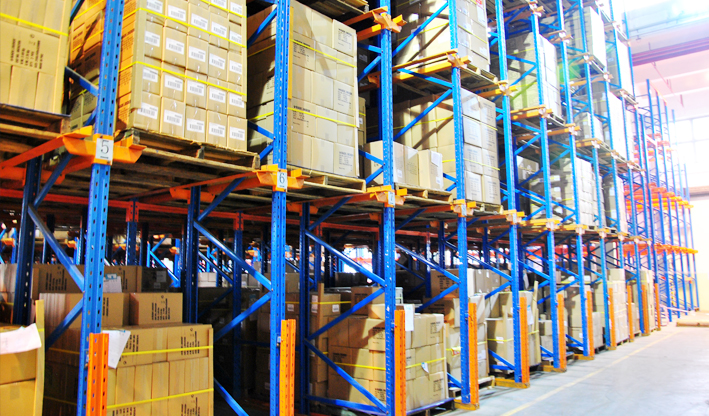
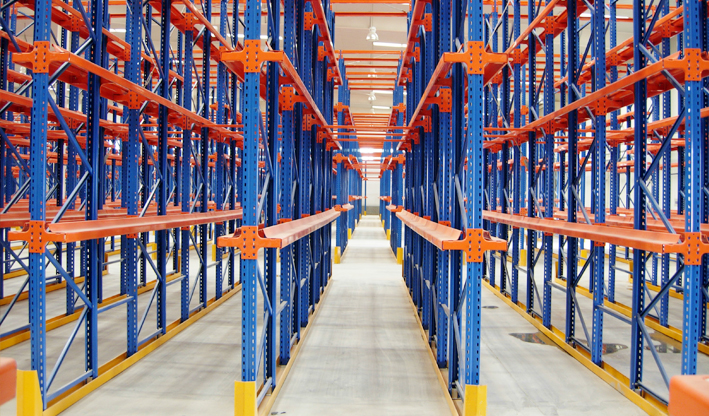
High Storage Density: Drive-in racking maximizes storage space by minimizing aisle requirements, making it an excellent choice for high-density storage of homogeneous goods.
-
Improved Space Utilization: It efficiently utilizes both vertical and horizontal space, ensuring optimal use of the available warehouse area.
-
Last-In, First-Out (LIFO): Drive-in racking is designed for LIFO inventory management, where the most recently loaded pallets are the first to be retrieved.
-
Cost-Effective: The reduced need for aisles and a higher storage capacity per square foot make it a cost-effective solution for businesses looking to save on warehouse costs.
-
Suitable for Cold Storage: Drive-in racking is ideal for temperature-controlled environments like cold storage, where space efficiency is crucial.

-
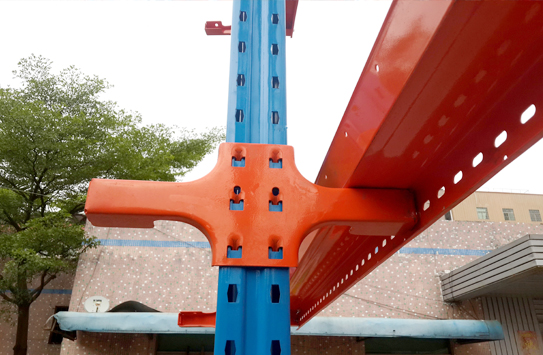
Quality and Durability: LIJIN is known for producing robust and durable storage solutions. Their drive-in racking system is built to withstand heavy loads and endure the rigors of daily warehouse operations.
-
Customization: LIJIN offers customization options, allowing you to tailor the drive-in racking system to your specific storage needs. This flexibility ensures that the system aligns with your unique requirements.
-
High Storage Density: LIJIN’s drive-in racking system is designed to maximize storage density by minimizing aisle space. It’s a great choice for businesses looking to make the most of their available storage space.
-
Efficient Space Utilization: By eliminating the need for extra aisles between racks, LIJIN’s system allows you to utilize the entire warehouse footprint efficiently, saving valuable floor space.
-
Cost-Effective: This system offers cost savings by optimizing storage capacity and reducing the overall cost of storage per pallet position.
-
Last-In, First-Out (LIFO): If your inventory management follows a LIFO approach (where the most recently loaded items are the first to be retrieved), LIJIN’s drive-in racking system is an ideal choice.
-
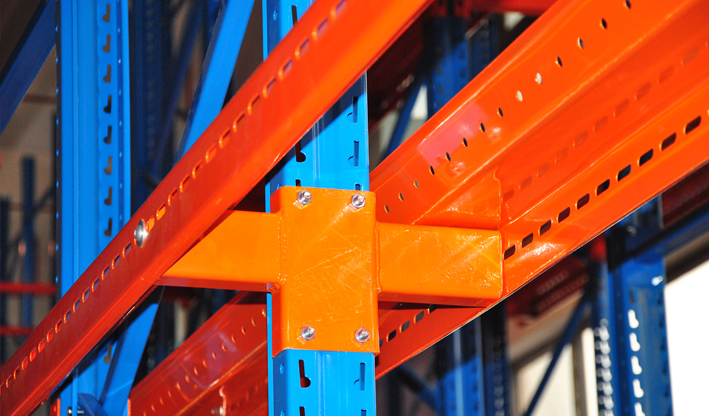
Safety Features: LIJIN’s drive-in racking system typically incorporates safety features such as upright protectors and guide rails to enhance safety in the warehouse.
-
Quality Assurance: LIJIN may offer quality assurance and certification for their drive-in racking systems, ensuring that the product meets industry standards and regulations.
-
Experience and Reputation: LIJIN may have a reputation for delivering reliable and high-quality storage solutions, backed by years of experience in the industry.
-
Customer Support: LIJIN may provide excellent customer support, including installation assistance, maintenance, and after-sales service to ensure a smooth and trouble-free experience with their drive-in racking system.
Given the need for organized storage and easy access to various food products, drive-in racks are used for storing perishable goods, canned items, and other food and beverage products.
Manufacturers often use drive-in racking for storing raw materials, work-in-progress, and finished products. It’s a cost-effective solution for handling large quantities of materials.
Drive-in racks are particularly well-suited for cold storage facilities where temperature control is critical. This system’s space efficiency is essential in such environments.
Maximizing Storage Space with LIJIN – Your Professional Cantilever Racking Suppliers and Expert Racking Installation Guides
In the world of warehousing and storage solutions, LIJIN stands out as your premier partner, offering top-quality Cantilever racking systems and comprehensive installation support. As a trusted industry leader, LIJIN is committed to helping businesses optimize their storage capabilities, ensuring efficient, organized, and secure warehousing.
Your Professional Cantilever Racking Suppliers
LIJIN, known for its dedication to quality, presents a wide range of Cantilever racking options, tailored to meet the unique storage needs of various industries. Cantilever racking is designed to store long, bulky, or irregularly shaped items, making it the ideal solution for businesses with demanding storage requirements.
Our Cantilever racking systems feature:
- Versatility: Whether you’re handling steel pipes, lumber, furniture, or other oversized goods, our Cantilever racking systems can be customized to accommodate your specific products.
- Durability: LIJIN’s Cantilever racking is built to withstand heavy loads, ensuring the long-term safety and stability of your stored items.
- Space Efficiency: With a focus on space optimization, our racking solutions provide businesses with the ability to make the most of their available space while maintaining easy access to their goods.
- Tailored Solutions: LIJIN offers customized Cantilever racking designs to suit your particular storage requirements, whether you’re dealing with varying load sizes or need specialized configurations.
By choosing LIJIN as your Cantilever racking supplier, you’re investing in a reliable and efficient solution that will streamline your storage operations, ensuring your products are readily accessible and protected.
Professional and Fast Cantilever Racking Installation Tutorials
LIJIN is not just your supplier; we’re your partner in making your storage dreams a reality. Our commitment to providing comprehensive support extends to offering professional and fast Cantilever racking installation tutorials. We understand that getting your racking system up and running quickly is essential to your business operations.
Our installation tutorials include:
- Clear and Concise Instructions: Our step-by-step installation guides are designed to be easy to follow, ensuring that your racking system can be installed efficiently and correctly.
- Expert Tips: Benefit from the experience and knowledge of our experts as they share valuable tips and insights to make the installation process smoother.
- Safety First: LIJIN emphasizes safety at every step. Our tutorials include safety guidelines to ensure that the installation is carried out without risks to personnel or property.
- 24/7 Support: If you encounter any challenges during the installation process, our customer support team is available around the clock to provide assistance and guidance.
With LIJIN’s Cantilever racking installation tutorials, you can count on a hassle-free and rapid setup, ensuring that your business can start benefiting from your new racking system as soon as possible.
In conclusion, when you partner with LIJIN, you’re choosing excellence in Cantilever racking solutions, backed by unparalleled support and expertise. We are your professional Cantilever racking suppliers, dedicated to providing you with top-quality racking systems and ensuring that the installation process is both swift and successful. Elevate your storage capabilities with LIJIN today!